Last week I made some hair accessories for my youngest granddaughter. Today, I'll show you how to make these corded flowers. Two of my granddaughters helped to make these. If you are making them with children, you will want to do the glue gun part yourself because the glue gets dangerously hot. Alternatively, you could use another type of fabric glue, or hand sew the materials if you prefer.
First, gather your materials. You will need: fabric ( good way to use up some scraps), a glue gun, buttons, cording (I used clothesline), and whatever you want to attach your flower to - headband, scrunchie, hair ties, barrette. You will also need either a needle and thread or a sewing machine, and a rotary cutter or scissors. Optional: felt for embellishment and finishing.
Cut or tear your fabric into 1" strips.
You need enough length to wrap the cording, so you will probably have to join two or more strips together at the short ends, either with a sewing machine or by hand.
Decide how big you want your flower by rolling the cording in a spiral on the table to the size you like. Then cut the cording a little longer.
Secure one short end of your fabric strip to one end of the cording, either by stitching it by hand or machine, or using the glue gun.
Start wrapping the fabric strip at an angle around the cording overlapping the fabric so that no cording shows.
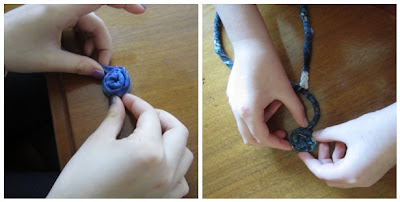
When you've reached the end of the piece of cording, start spiraling the wrapped cord into your flower shape by making a tight circle around the center.
Keep it tightly wound and flat as you take it to your gluing station. If you are hand sewing it together, you want to pin it together at this point.
Tuck the end of the cording underneath your rolled flower so that no cording shows and glue (or sew) in place.
Add embellishments like felt leaves and stacked buttons using a glue gun, or hand sewing in place.
Attach to your choice of hair accessory. We put one flower on top of a barrette, and made two headbands.You can also attach them to scrunchies or hair ties. If attaching to a headband, decide where you want your flower before gluing by modeling in the mirror.
Start wrapping the fabric strip at an angle around the cording overlapping the fabric so that no cording shows.
 |
| Keep the fabric as flat and tight around the cording as you can. |
When you've reached the end of the piece of cording, start spiraling the wrapped cord into your flower shape by making a tight circle around the center.
Keep it tightly wound and flat as you take it to your gluing station. If you are hand sewing it together, you want to pin it together at this point.
Tuck the end of the cording underneath your rolled flower so that no cording shows and glue (or sew) in place.
 |
| My eldest granddaughter has experience with glue guns, but I wouldn't suggest that children do this part of the process |
Attach to your choice of hair accessory. We put one flower on top of a barrette, and made two headbands.You can also attach them to scrunchies or hair ties. If attaching to a headband, decide where you want your flower before gluing by modeling in the mirror.
Use your glue gun (or stitch) the flower to hair accessory.
Putting felt on the back makes a nice finish.
And here are the finished results.
This is another example attached to scrunchie.


So cute!! I'll have to do this with my granddaughters. :)
ReplyDeleteSo creative! I loved the possibilities it provides. Thanks.
ReplyDelete