This 12 or 14" pillow will make a nice accent for your bedroom or livingroom.
Start with your block - if you missed the instructions, the PDF file is here.
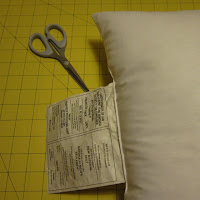
Buy a 12" or 14" pillow form. For the 14" size, you will be adding a one inch border around the block. {Instructions are for the 14" size. If you make a 12" pillow, eliminate the 1" border, and cut the backing piece 12 1/2" square.}
Cut off the manufacturer's tag.
From a coordinating fabric (I used one of the fabrics from the block), cut two 1 1/2" x 12 1/2" strips, and two 1 1/2" x 14 1/2" strips. Cut a backing out of the same fabric 14 1/2" square.
I added a zipper to my pillow, but you could skip the next few steps and just sew your pillowcase shut after you stuff it if you prefer.
Use an invisible zipper. I had one on hand the perfect green, but it was too long. No problem. After adding the zipper, I just sewed across the top end and cut off the extra.
Pin one side of the zipper facing, right sides together to one side of the backing fabric. Sew as close as you can to the zipper. The Sew Katie Did Blog has an excellent tutorial about adding an invisible zipper to your pillow, if you need more detailed instruction.
Sew the other side of the zipper tape to the right side of your pillow.
Sewing tip: I keep a stack of sewing projects near my machine to start and finish threads on my current project. Chain sewing wastes less thread, and I don't like to restart thread because there is a greater chance for it getting tangled or making a thread nest on the back of my work.
 |
| Start and stop thread on other sewing projects. |
Here is how the finished zipper looks.
Now put the pillow case right sides together and stitch the three sides that don't have the zipper. Be sure to open the zipper before you start so that you have a way to turn the case right sides out.
Sewing tip: Stop with your needle down a stitch or two from each corner, pivot, and take two stitches across the corner as shown in this picture. Then pivot again and continue sewing down the next side. This will prevent "dog-ears" on your pillow corners.
Turn your pillow case, poke out the corners, stuff with your pillow form, and voila....
You have a nice new pillow!
Happy Sewing♥


Thank you for this!
ReplyDeleteI'm really into decorating our home at the moment and have been wanting to have an assortment of crocheted and sewn cushions around the house.
You are so right, this is a great way to use those extra blocks, thanks for the inspiration.
ReplyDeleteThis is so pretty!
ReplyDeleteThis is so nice and wonderful...thanks for the inspiration...You have a nice blog, too.
ReplyDeleteGreatings from Klaudia (Germany)